Last summer I bought a set of narrow band filters selling off some older Ham Radio equipment I no longer used. The filters are an SHO set (Sulphur, Hydrogen & Oxygen (Sii, Ha, Oiii)). Due to weather & Travel …Lots of Travel, This night was first chance I got to try out the new filters. If you feel your eyes glazing over with the Technical Jargon, sorry :-)…
My ASI183 Camera is the GT model with has a built-in 1.25″ x 5 Filter tray. Up to now, I’ve been imaging using combination of bandwidths in the filters, LRGBHa. The LRGB (Luminous, Red, Green, Blue) are all wide band. The Luminous filter Hs the widest bandwidth at around 300nm whereas the RG & B filters are near 100nm each. The Ha filter is very narrow in comparison at 6.5nm, which I bought the matching Sulphur (Sii) and Oxygen (Oiii), both also at 6.5nm bandwidth,
Two things I have discovered that are inversely proportional to the bandwidth of the filter is the exposure times needed, and the cost of the filters. Exposure time sounds easy, just increase the time the camera “Opens the Shutter”, or in the case of Digital, “Collects Photons”. Until now, the longest exposure I have tried was 2 minutes (120 Sec) as I learned to properly align and guide with the new mount. Reading up on Narrow Band imaging, most everywhere says a minimum of 5 minute exposures are best for narrow band imaging, so that’s where I started.
The second Gotcha with narrow band is the Cost! Luckily I already had the Ha filter & only had to purchase the Sii & Oiii filters. The cost of those two alone matched the amount I sold the old Yaseau MK-1000 HF rig for. Interestingly, these are Not the narrowest filters available. There are 3nm filters available, but that might require the sale of my old F250!!

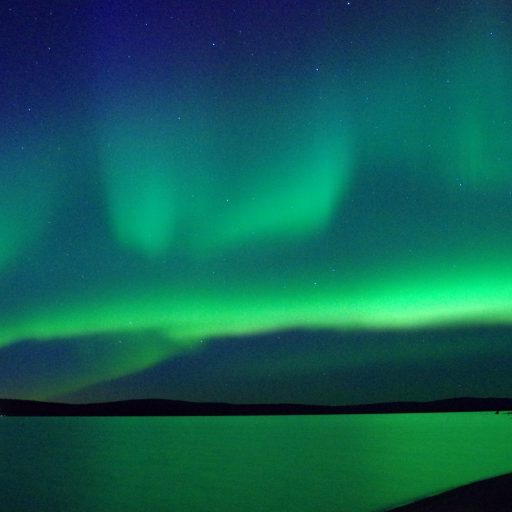
I intended my first narrowband image to be of M42, Orion Nebula and after aligning the scope, I had almost 3 hours before Orion was high enough to start imaging. After aligning, the scope was very close to SH2-220 nebula so I slewed to it, more just to have something to center on, and setup the scheduler to take 300 second SHO images until Orion was up enough. The scope slewed to M42, aligned, started guiding & then taking 300s images of M42, all without a hitch. The next day, all the images of M42 were process, with great success!! I then decided to see if anything came from the Sh2-220 images, so I stacked all 33 of the images (without reviewing any) and what I ended up was the image above which was extremely disappointing. Normally at this point in the processing, at least a slight outline will be visible, but I could see nothing there.
I almost gave up on the image, but clicked did a Normalized Stretch (basically adjusting the contrast), which is 1 click and about 30 seconds of processing….
When the Normalized Tone Stretch finished, the image below Popped onto my screen and I almost tipped over in my chair with surprise. WOW!! The color & detail that came out from the image above was amazing.
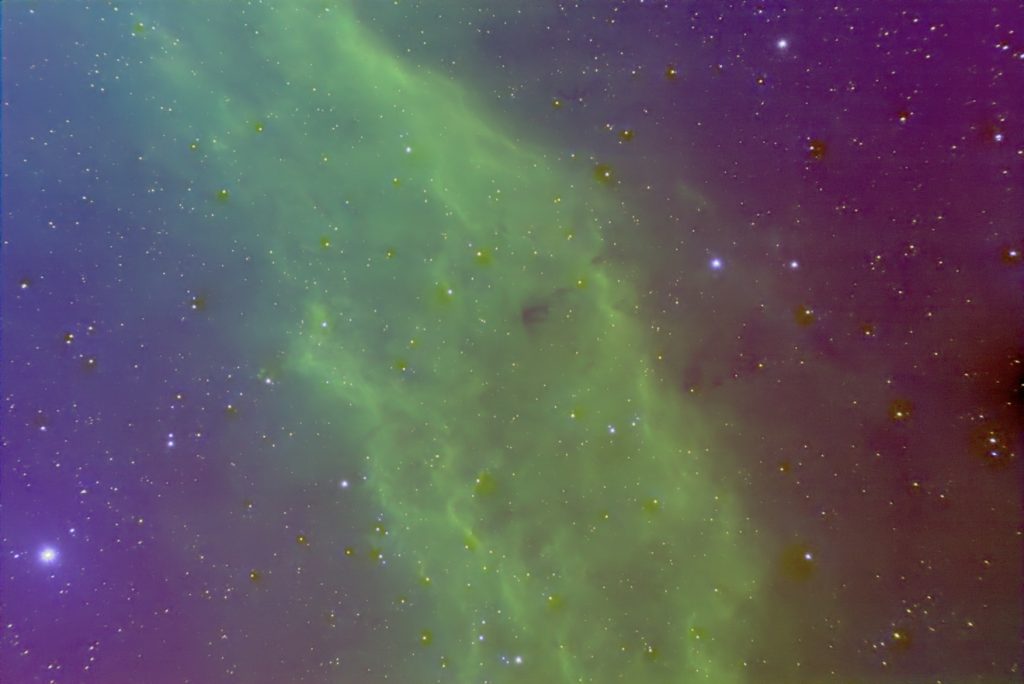
I did very little other processing to the image and the final result is posted HERE!
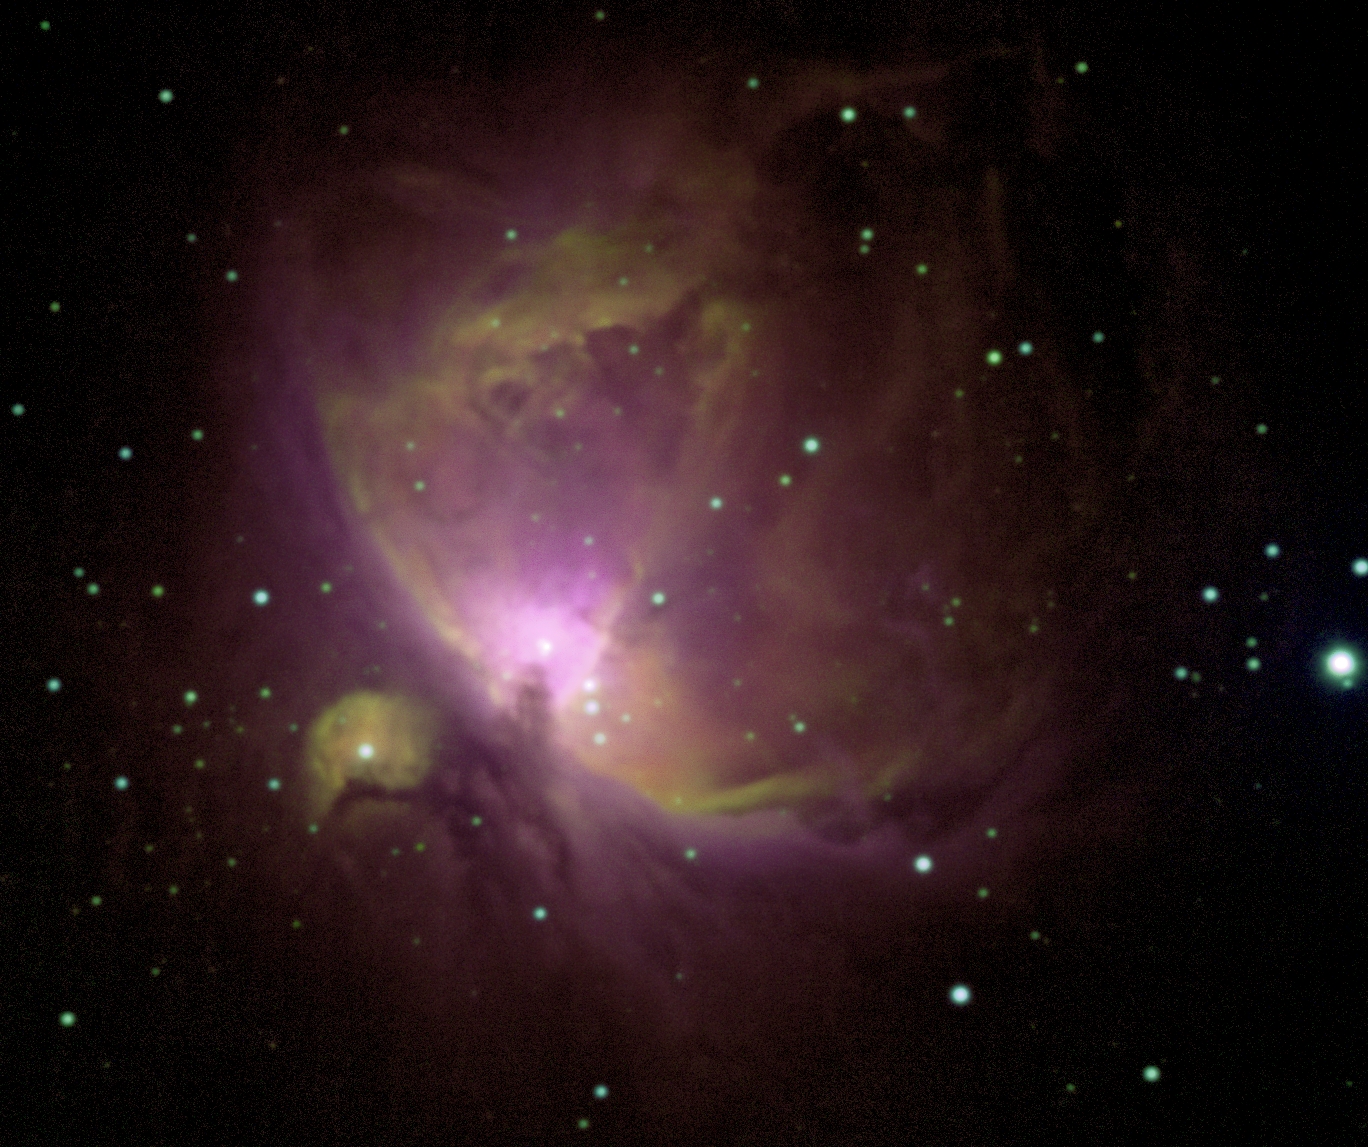
But, the actual target for that night was M42, The Great Orion Nebula, (Always a nice target for first light on any equipment 🙂
Click on the image below of M42 to view the full page.
Leave a Reply
You must be logged in to post a comment.